How to Use Gravity Forms in WordPress
How to Use Gravity Forms Part One
If you’ve worked with WordPress for awhile, you’ve probably used the free Contact Form 7 Plugin at least once for quick sign-up forms such as email subscriptions or free downloads.
But have you ever needed to collect a serious amount of data on a website and found yourself struggling to create a nice-looking form?
If so, then look no further than Gravity Forms. While it’s not free, it’s definitely worth looking into a Gravity Forms personal or business license.
Gravity Forms lets you easily create and style a form, divide the form into sections, and optionally display a progress bar as the user fills out the form.
Like Contact Form 7, you will receive an email notification when someone submits the form on your website.
Unlike Contact Form 7, however, the submitted form data will be stored in a database after notifying you of a new entry.
So even if you don’t receive the notification or if you accidentally delete the e-mail notification, you will still have a record of all the form submissions you have received.
Those form entries can be found in the WordPress dashboard.
Learning Gravity Forms
There is a bit of a learning curve with Gravity Forms so I thought I’d put together a simple blog series with accompanying video tutorials to share some helpful tips I learned along the way.
Part One of this series will explain how to use Gravity Forms in WordPress and will cover the following topics:
Then our article How to Style Gravity Forms explains how to style and format your form.
It also shows how to use shortcodes to add your Gravity Form to a WordPress post or page.
Next our Gravity Forms Tips and Tricks post explains advanced topics such as spam prevention, PayPal redirects and more.
So let’s get started!
How to Install Gravity Forms Plugin
Once you purchase the Gravity Forms license, you will be given a download link for the plugin zip file. Download the file and then install the plugin just like any other purchased plugin.
Next, you’ll need to activate the license key. Your key was emailed to you along with your download link when you purchased your license.
Choose Plugins>Installed Plugins.
Then click Gravity Forms>Settings and provide your license key. Once validated, you are eligible for automatic upgrades and support.
Watch the step-by-step YouTube video tutorial and learn how to install Gravity Forms in WordPress and activate your license key.
Now it’s time to build your first form!
How to Create Your First Gravity Form
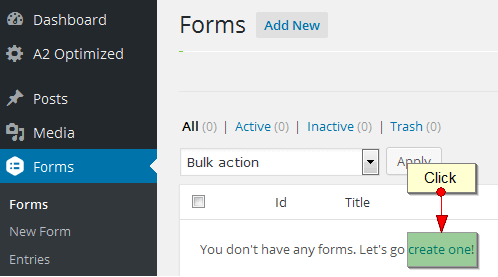
Click on Forms in the dashboard and you will be presented with a screen that shows you don’t have any forms.
Click on the “create one” link.
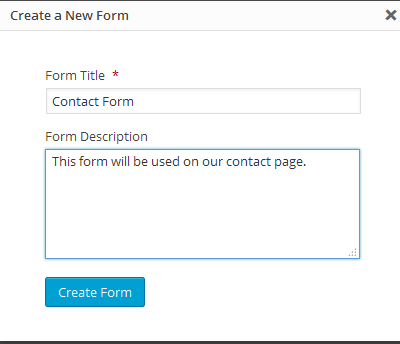
Next, fill in the form title and description and click the Create Form button:
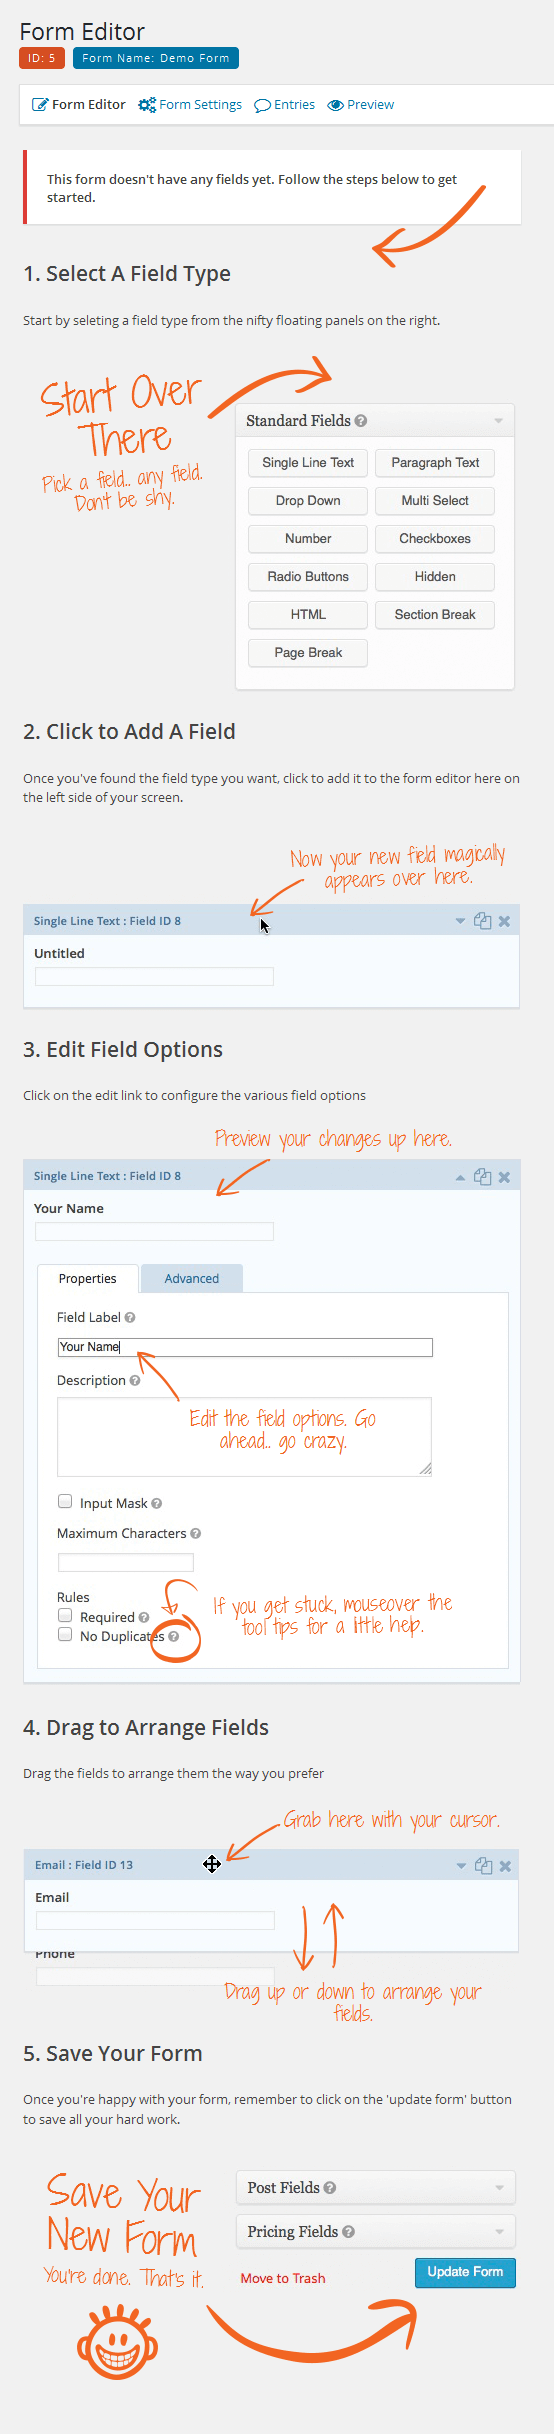
The Form Editor opens and displays a screen with steps to add your first field. It prompts you to select a field type.
You’ll find 4 panels on the right side of the screen from which to choose elements to build your form:
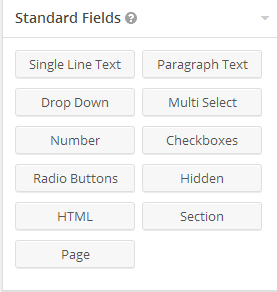
Standard Fields
This panel allows you to choose fields for basic form functionality:
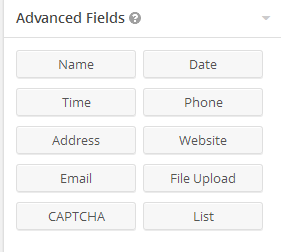
Advanced Fields
This panel includes field types that have advanced formatting:
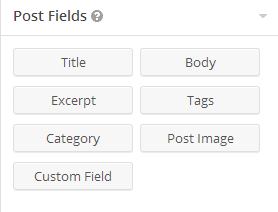
Post Fields
This panel creates a form which generates a post when it is submitted. You can find detailed instructions on how to use post fields here.
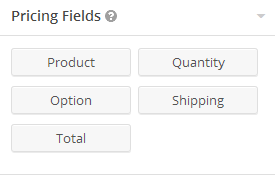
Pricing Fields
Pricing fields panel lets you add functionality for selling goods and services.
Create Your First Form
Creating your first Gravity Form is easy! The form editor walks you through the process of creating your new form.
In this section, you’ll see the step-by-step screen shots directly from Gravity Forms. At the end of this section you can watch a short video tutorial that will show you how to create your first Gravity Form.
First, log into your WordPress dashboard and click Forms > New Form.
The form editor gives you instructions for creating your new form:
Watch the step-by-step video tutorial and learn how to use Gravity Forms in WordPress to create your first form.
In Summary
In this tutorial you learned how to use Gravity Forms in WordPress and activate the license. You also learned how to create your first form.
Part Two will show you how to style your Gravity Form, add sections, and create a progress bar. You’ll then learn how to add the form’s shortcode to a WordPress page or post.
Part Three will share tips on advanced topics and will show you how to prevent spam, redirect your visitor to PayPal, and troubleshoot email notifications.
Image Credit: Fotolia