How to Use Astra Widgets
This post will show you how to use Astra Widgets to quickly add widgets into your WordPress site.
If you’ve already set up a site using the free Astra theme or Astra Pro plugin, this post is for you!
Astra Widgets is a handy little free plugin that lets you display address, list icons or social profiles within the Astra Theme.
You decide where you want to place the widget on your site.
You can add the widget into your header, sidebar, footer bar or footer widget.
And then add your information to the specific fields within that widget.
You can choose whether or not you want to display the icons, which I’ve chosen to display here:
So let’s see how this is done!
How to Set Up and Use Astra Widgets
In order to use Astra Widgets, you need to download, install, and activate the free Astra Widgets plugin.
Once done, go to Appearance > Widgets.
You’ll see three new widgets from which to choose:
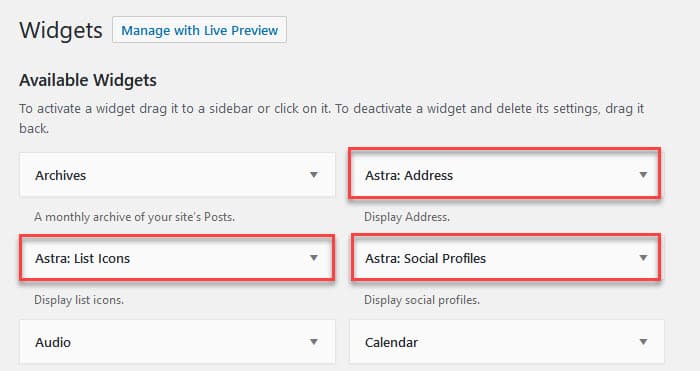
Next decide where you want the widget to appear, configure the settings and save it.
We’ll look at each of the available widgets:
- Astra: Address
- Astra: List Icons
- Astra: Social Profiles
First we’ll see how to use the Astra: Address Widget to display your address in the sidebar.
Then we’ll look at Astra: List Icons and Astra: Social Profiles widgets.
Display Astra Address Widget
To display your address in a sidebar, follow the steps below.
- Go to Appearance > Widgets.
- Click Astra: Address
- Select Main Sidebar
- Click Add Widget
- Configure your address widget with your information
- Click the Display Icons checkbox if you want icons to show like the “Contact Us” example below:

Here’s a step-by-step demo below:
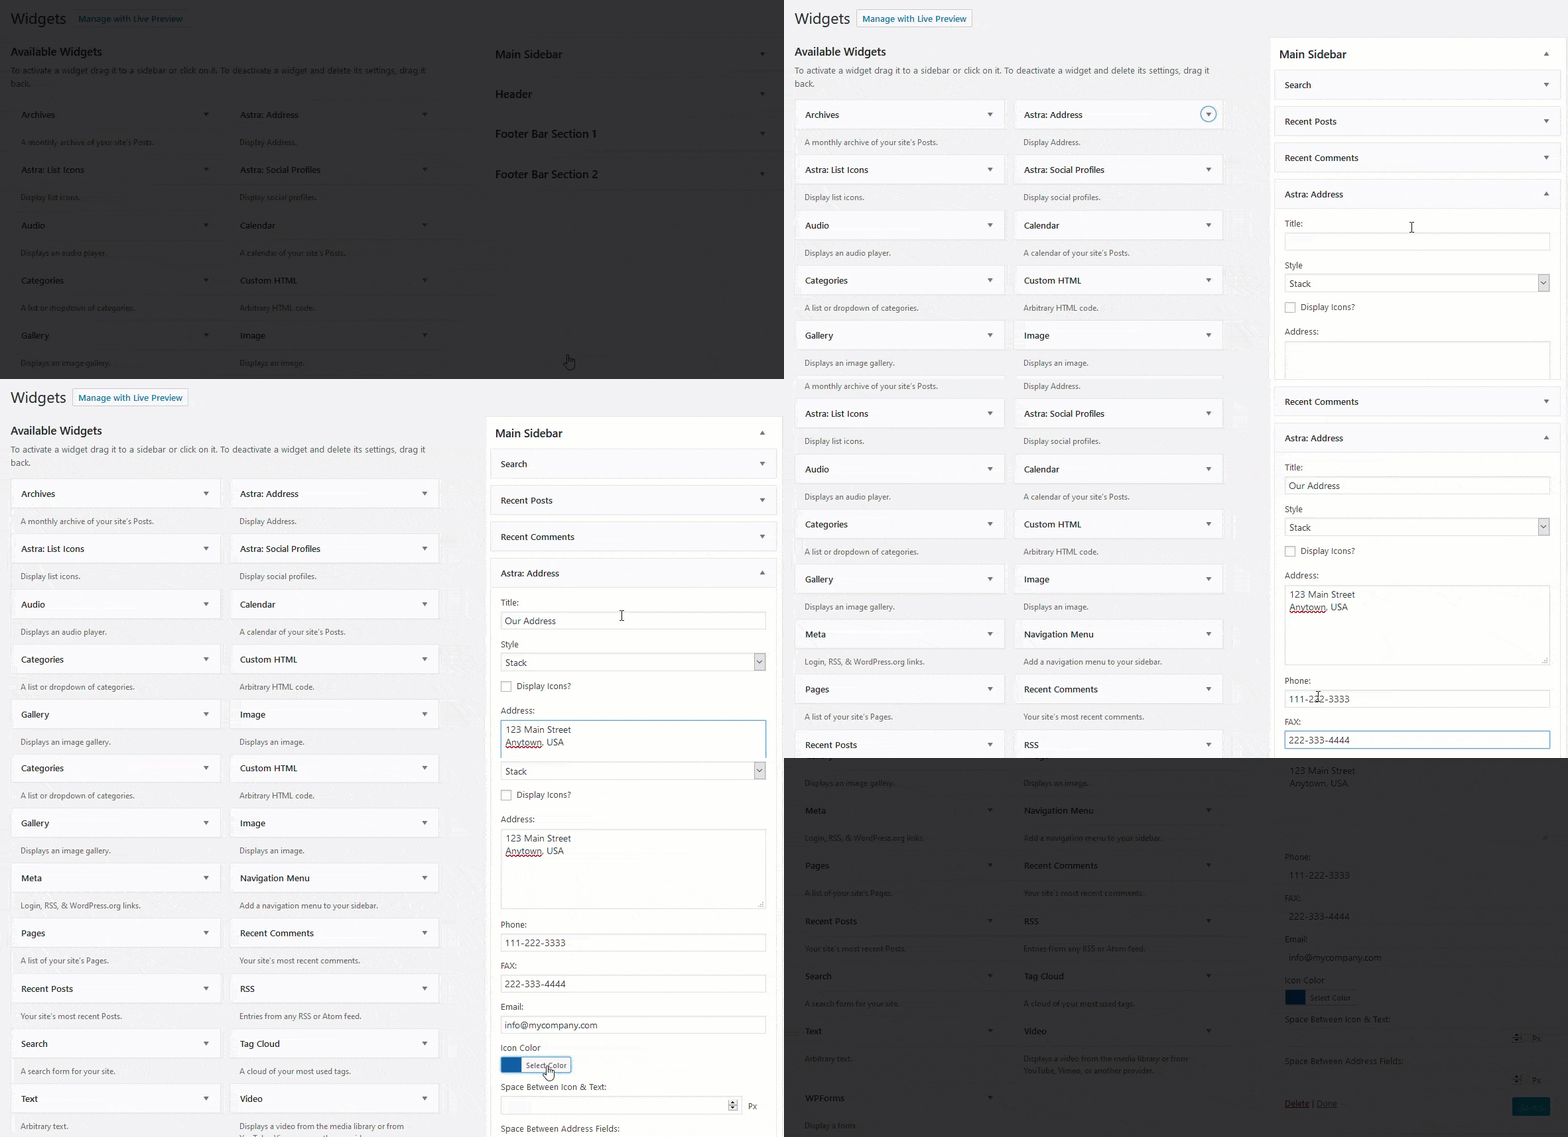
And now your sidebar will have the address widget!
Display Astra Social Icons Widget
In just a few steps you can set up and use Astra Widgets to display your social icons in your header, footer, or sidebar.
Make sure you have enabled the new Header/Footer Builder in Astra Option. Then:
- Go to Appearance > Widgets
- Click Astra: Social Profiles
- Select your sidebar, header or footer builder widget
- Click Add Widget
- Configure your Social Icons Widget
Once the widget is added, click Add Item then Add Profile.
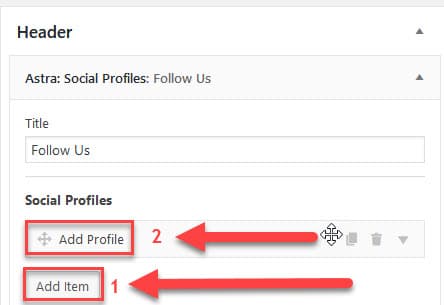
Then add your information into the settings:

Then repeat for remaining platforms by clicking the Add Profile link.
When done, click Save.
Display Astra List Icons Widget
The last widget we’ll look at is Astra: List Icons.
Configuring this widget is similar to the social icons.
For this demo, we’ll add the List Icons to our Footer Widget.
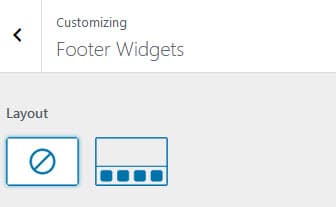
But first you’ll need to choose a Footer Layout because the theme default is no footer widgets.
To do this with the free Astra theme, go to Appearance > Customize and choose the 4-widget layout:
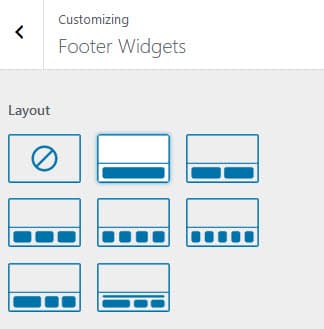
If you’re using Astra Pro, you have up to 8 configuration options.
So go to Appearance > Customize and select from one of the following formats:
Next, in order to use Astra Widgets to display a list in a footer widget such as Footer Widget Area 1, follow these instructions:
- Go to Appearance > Widgets
- Click Astra: List Icons
- Select Footer Widget Area 1
- Click Add Widget
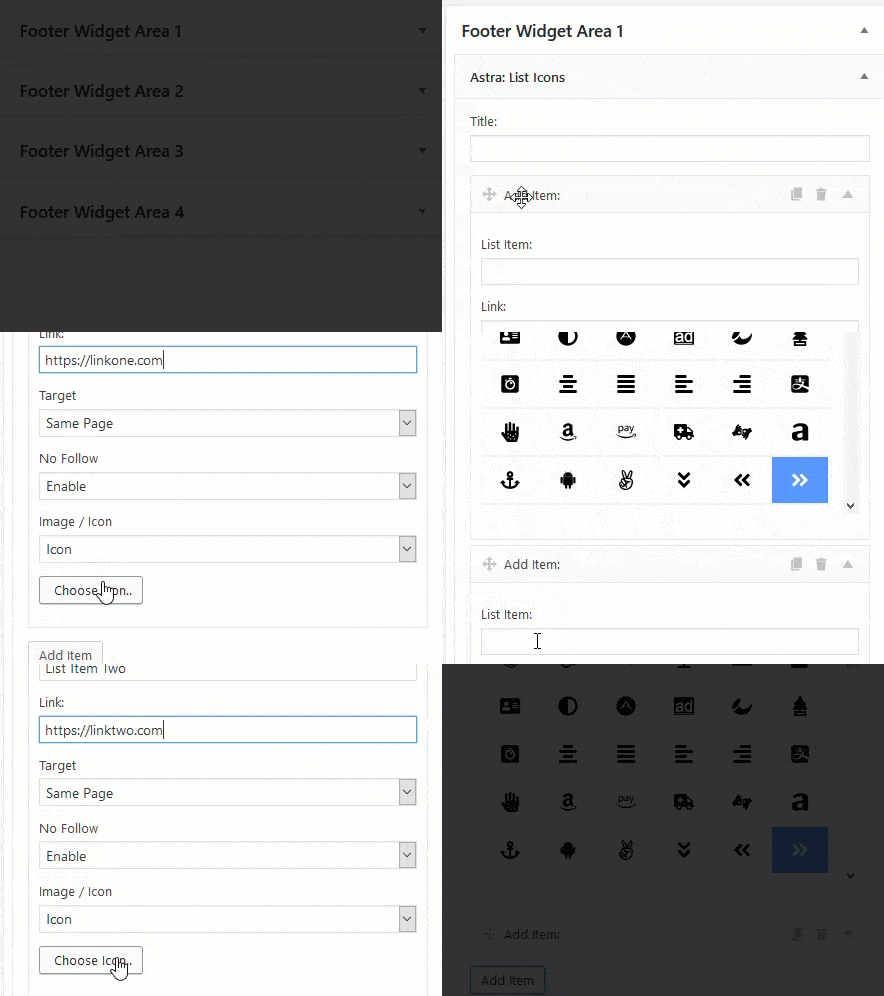
- Configure your List Icons Widget
You can follow the step-by-step demo below for configuring the List Icons.
And now you’ve know how to add Astra: List Icons Widget to a Footer Widget Area.
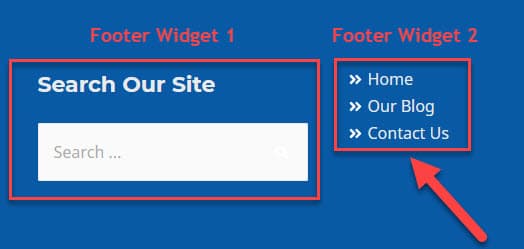
Here’s an example of Astra: List Icons in Footer Widget 2:
So you see how you can add some nice features to your website when you use Astra Widgets.
Astra Widget Video Demos
Below you’ll find two short video tutorials that explain how to use Astra Widgets to add an address widget or a list icons widget to your site.
I hope this post has been helpful and you understand how to use Astra Widgets with your Astra theme!


